Cart
0
Complete Your Setup




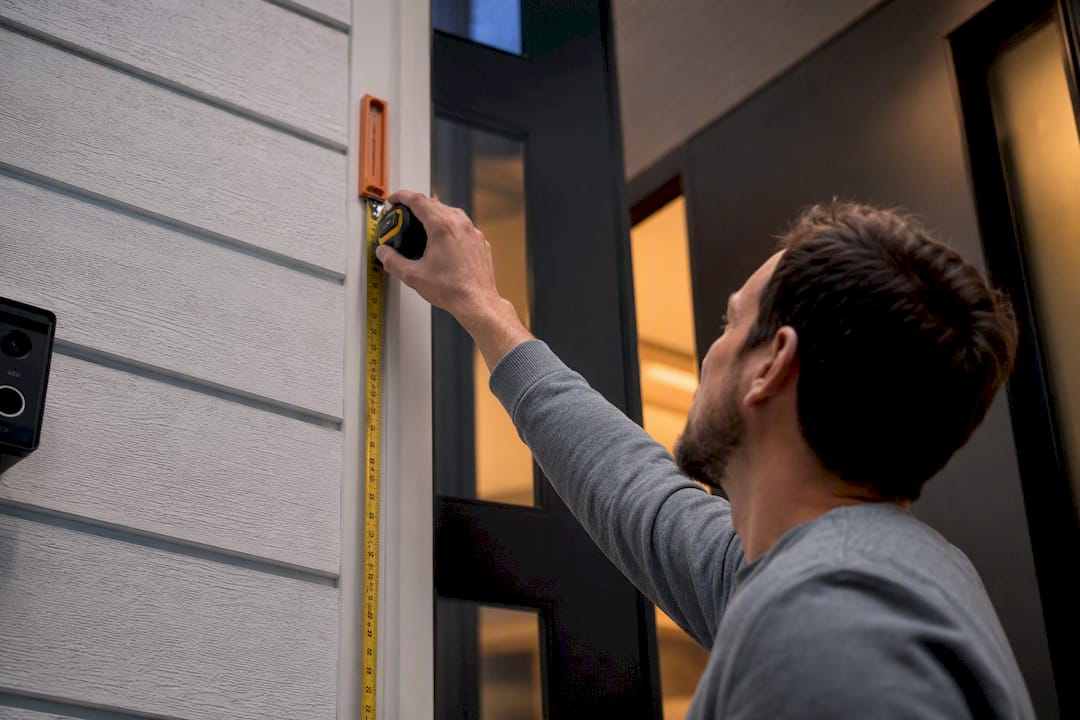
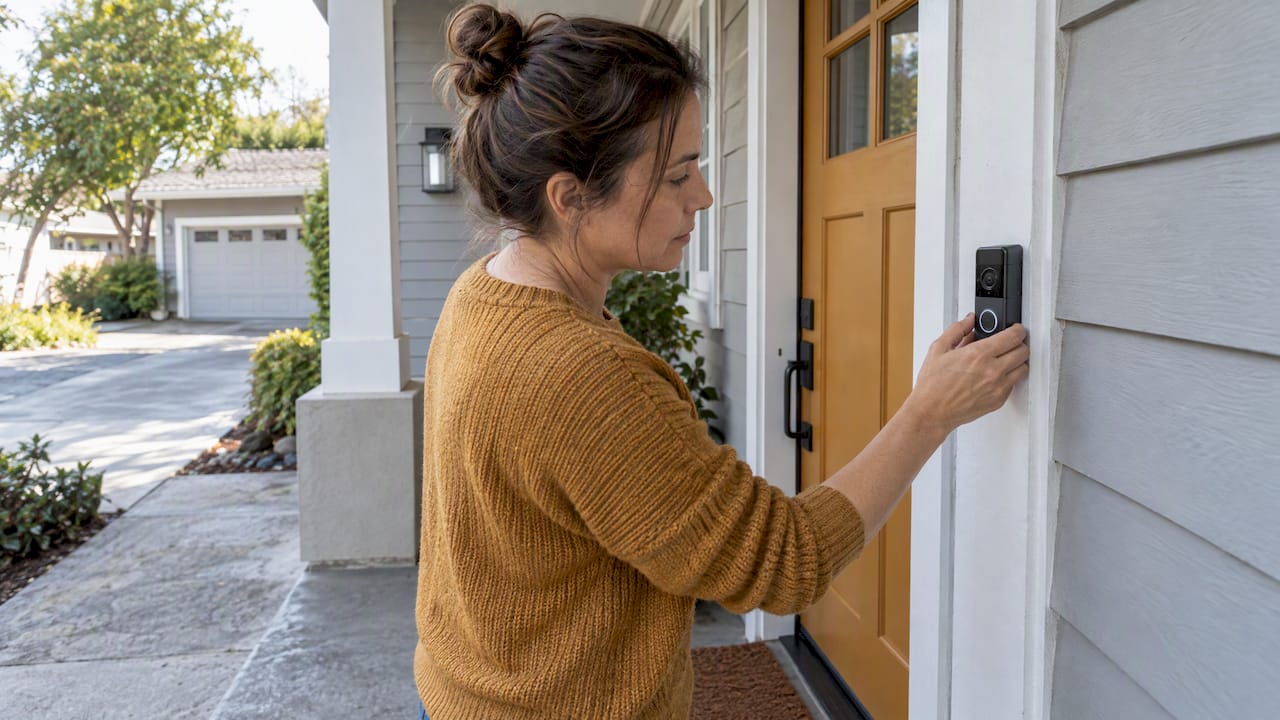
Mount your doorbell camera about 48 to 52 inches above the ground on the latch or handle side of your door, angled slightly downward. This height and position capture faces clearly, keep packages in frame, and give you a wide view of the approach path. Always preview the live feed on your phone before you drill a single hole.
TL;DR:
- Mount the doorbell camera at 48 to 52 inches on the latch side, angling it slightly downward to optimize face and package visibility.
- Use a wedge or corner mount to correct framing issues caused by siding or uneven wall surfaces before repositioning the camera.
- Keep motion detection zones within 5 to 20 feet of the camera and adjust sensitivity to reduce false alerts from passing cars or passing pedestrians.
- Choose a wireless battery-powered model for placement flexibility in rental homes or on walls without existing wiring, but be prepared for regular recharging.
- Test signal strength, camera angles, and motion zones during setup to avoid future adjustments or drilling mistakes.
A height of 48 to 52 inches is the sweet spot for most homes, and it’s why manufacturers keep repeating it. Mounting a video doorbell around 48 inches (1.2 m) off the ground is the industry standard for a reason: it sits close to eye level for most adults, so faces show up clearly, while the camera still tilts down enough to catch a package sitting on the mat.
Every home is different, so treat 48 inches as your starting point, not a rule carved in stone.
Tilt matters just as much as height. A slight downward angle widens your field of view to include the doorstep without sacrificing facial detail. Too flat, and you’ll only see foreheads. Too steep, and you’ll lose the approach entirely.
The latch side, not the hinge side, almost always gives you the better shot. Placing the doorbell on the latch or handle side captures visitors in their natural standing position, since most people approach and reach for the handle rather than lingering near the hinges.
Flush mounts don’t always cooperate with your door’s layout, though. Siding angles, trim, or offset wiring can leave the lens pointing at a fence instead of your front walkway.
Pro Tip: Small angle corrections fix most bad framing problems. Before you assume you need a different mounting spot entirely, try a $10 wedge kit first.
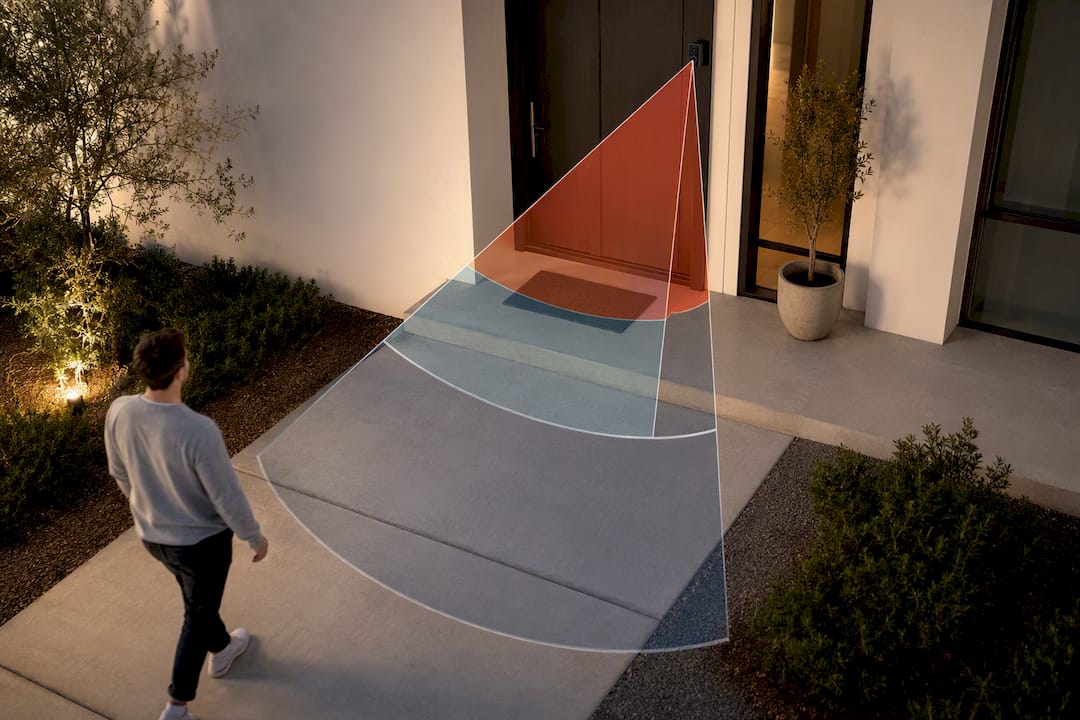
Side-to-side motion triggers stronger, cleaner detection than someone walking straight at the camera. That’s simple geometry: a body moving across the frame changes more pixels per second than one approaching head on, so your camera’s algorithm reads it as a clearer signal.
Aim to keep your primary detection zone within 5 to 20 feet (1.5 to 6 m) of the camera, adjusted for your specific device and yard layout.
Skip these adjustments and you’ll end up with a phone buzzing every time a squirrel crosses the lawn.
Your power source shapes where you’re allowed to put the camera, so decide this before you finalize placement. Battery-powered models let you mount the camera anywhere you want, since there’s no wiring to route. That flexibility makes them the go-to option for renters or anyone with a door frame lacking existing doorbell wiring.
The tradeoff is maintenance: battery units typically need recharging every couple of months, depending on how often motion alerts and live-view checks drain the cell.
If you’re still weighing the ongoing cost of either option, this breakdown of doorbell camera pricing covers what to expect beyond the sticker price.
Testing before you drill saves you from patching holes later. Start by checking your Wi-Fi signal right at the mounting spot, not just standing near your router.
Only move to permanent mounting once every one of these checks passes.
Once you’ve settled on a spot, the actual mounting takes less than an hour for most homes.
Pro Tip: Take a photo of your final live-view frame right after setup. If you ever need to reposition the camera after trimming a bush or repainting the door, you’ll have a reference to match.
Most doorbell camera complaints trace back to one of a handful of fixable errors.
Most people treat doorbell camera placement like a one-time decision, mounted once and never revisited. That’s a mistake. Porches change. Bushes grow. A tree that offered dappled shade in spring can flood your lens with glare by summer.
The bigger issue Sabezon sees in setup questions is the tug-of-war between detection sensitivity and neighbor privacy. Cranking sensitivity to catch every passerby also means recording the sidewalk, the neighbor’s driveway, and anyone walking a dog past your house. Tightening your motion zone to just your own walkway respects that boundary and still catches what matters: someone actually approaching your door.
— Tony
If wiring limitations or rental restrictions have been holding back your placement options, that’s exactly the problem Sabezon’s Entryx™ Smart Doorbell Camera solves. It’s a wireless design, so you can mount it at the ideal 48 to 52 inch height on the latch side of any door, no existing doorbell wiring required. It ships with a wedge mount included, so correcting for an awkward door angle doesn’t mean an extra hardware store trip.

Before you buy any doorbell camera, check three things: compatibility with your home’s Wi-Fi setup, the return policy, and whether mounting hardware comes with the product. Browse the full smart home tech collection to compare your options, and pick a camera built for the exact placement your entryway needs.
Mount it on the latch or handle side of the door frame, 48 to 52 inches above the ground, angled 10 to 15 degrees downward to capture both faces and packages.
Most manufacturers recommend around 48 inches (1.2 m), adjusted up to 52 inches for raised porches or down slightly for low thresholds.
Skip spots facing direct sunlight, reflective glass, or deep covered alcoves, since all three cause glare or dark, unusable footage.
Common complaints include nuisance motion alerts from passing cars or pedestrians, battery drain from frequent live-view checks, and privacy concerns from neighbors when detection zones extend past the property line. Correcting motion zones and sensitivity settings, as covered above, resolves most of these issues without removing the camera.
Not always, but a wedge mount typically corrects framing by 15 to 25 degrees, which fixes most cases where a flush mount points away from your walkway.