Cart
0
Complete Your Setup




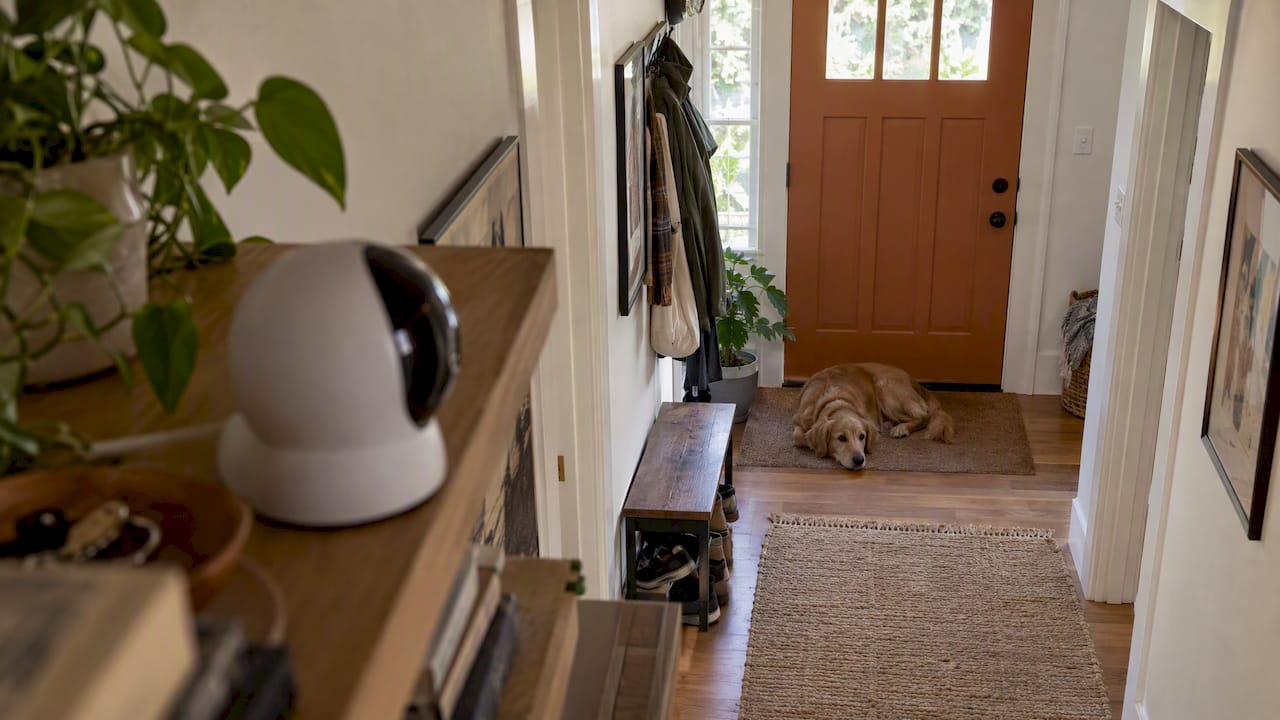
Put your pet camera where your pet actually spends its time, such as the bed, the feeding spot, the crate or a favorite window perch. Mount it high enough to see the whole zone, angle it down slightly, keep it away from direct sun, and keep the power cord out of reach of teeth and paws. Then check the live feed from your phone before you leave the house. This guide walks through each step, for dogs and cats, in the order you will do them.
Most placement mistakes come from picking a spot because it looks tidy. A shelf in the corner of the living room is a fine place to put a camera. It is a bad one if your dog spends the day in the hallway.
The better method is to watch your pet for a day or two and note where it goes. One pet-care guide recommends placing the camera where your pet spends most of its time, such as near beds, food bowls, play zones or windows. The same guide points to resting spots, feeding stations, entryways and window perches as the places that matter most.
Write a quick list before you mount anything:
The first two are the zones to cover. The last two tell you what you will see if your pet gets restless while you are away.
There is no single correct number, because rooms and pets differ. These rules work in most homes:
After you set the camera, do the walk test. Open the live view on your phone, then walk to each spot where your pet might be: behind the couch, under the table, beside the crate. Wherever you vanish from the screen, your pet will too. Move the camera a foot or two, or add a second one, until the zones you care about are covered.
Dogs tend to stay near a few places: the crate or bed, the couch, the front door and the window. Cover the one that matters most for your situation.
If you are watching for restlessness. Aim the camera at the door you leave through, plus the area where your dog settles. Pet cameras can show how your pet behaves while you are gone, including pacing, panting and restlessness that can signal distress. You will only catch those signs if the camera sees the places where they happen.
If your dog is in a crate. Mount the camera so it looks at the front of the crate, not down onto the top. You want to see the face and posture. Keep the camera a safe distance from the crate so your dog cannot chew the cord through the bars.

If you have a puppy. Puppies explore. Choose a mount that sits well above anything a puppy can reach, and plan to tidy cords before every absence. A puppy that has never been alone gets the most value from a camera, because you can see how it reacts and adjust your routine.
If you want to use two-way audio. Place the camera where your dog will look toward it. A spot near the resting area or the door works well, since that is where your dog is most likely to hear your voice and respond.
Cats use height. Their favorite places are often up: a window perch, a cat tree, a shelf. That changes the plan.
Extra features change where the camera should sit.
| Feature | Placement tip |
|---|---|
| Treat tossing | Place the camera so you can see both your pet’s approach and where the treat lands. Leave open floor space in front of it, not a narrow gap beside furniture. |
| Auto tracking or 360° view | Put it in the center of a long wall or on a shelf with open space on both sides, so it can turn without hitting objects. |
| Two-way audio | Aim it at the spot where your pet relaxes or waits by the door, so your voice reaches a pet that is looking your way. |
| Night vision | Keep the lens clear of reflective surfaces such as glass and glossy cabinets, which can bounce infrared light back into the picture. |
Whatever features you use, start with a basic view of your pet’s main zone. Add the extras once you know the camera sees what you need.
Our take
We build our range around one idea: smart products should be simple. A pet camera is the same. The best one is the one you actually set up correctly and check calmly, not the one with the longest feature list.
When we look at how people use a pet camera, we see the same pattern. Placement does most of the work. A well-placed camera that covers a bed, a bowl and a door tells you more than a fancy one pointed at an empty floor.
That is why we design our devices for easy setup without technical complexity. You should be able to mount the camera, connect it, check the angle and move on with your day. Our Watchly™ Smart Pet Camera is made with that in mind, and our setup guides walk through every step.
Take ten minutes to place it well. It pays off every time you open the app.
Tony
Lighting can ruin a good camera position.
If you cannot avoid a bright window, move the camera to the side so the window is at the edge of the frame, or close the blinds in the part of the day when the glare is worst.
A camera in the perfect spot is useless if the signal is weak or the cord does not reach.
Pets chew, paw and tug. Keep cords and devices out of reach of curious mouths and paws.
Practical steps:
If your pet is a chewer, ask your veterinarian about the safest setup for your animal.
A pet camera is a camera inside your home. Placement and settings both matter for privacy.
Choose the view carefully. Aim at your pet’s zone and keep it away from bedrooms, bathrooms and anywhere you change clothes. If a camera has to see a room where people are, use a privacy cover or turn it off when you are home.
Lock down the account. The U.S. Federal Trade Commission advises using a strong password you have not used elsewhere, two-factor authentication where available, and a camera that encrypts livestreams and stored video. It also recommends checking livestream-sharing permissions.
Secure the router. The same FTC page says to use a strong router password, WPA3 or WPA2 encryption, and the latest router software.
If you are comparing models, you can follow Blink camera deals alongside the encryption and account-security features you want. For doorbell and outdoor cameras, our guide to doorbell camera privacy settings covers more.

Don’t leave for eight hours the first time. Test the setup:
Once the camera is working, you can use the footage to understand your pet’s habits. Our guide to short tests that turn pet camera footage into a training plan shows how.
| Room or zone | What to cover | Common mistake |
|---|---|---|
| Living room | Couch, bed or favorite resting spot | Aiming at the center of the room |
| Kitchen or feeding area | Food and water bowls | Camera low enough to be knocked over |
| Entryway | The door you leave through | Pointing at the door but missing the waiting spot |
| Window perch | The perch from across the room | Sun glare behind the pet |
| Crate area | Front of the crate | Cord within reach of the bars |
| Bedroom | Only if your pet sleeps there | Capturing areas where people change |
Good placement works best with a camera that is simple to mount and connect. Our Watchly™ Smart Pet Camera is designed for easy setup, so you can get from the box to the live view quickly. See the Watchly Smart Pet Camera page for details, or browse the full range in our Smart Home Tech collection.

Not sure which features you need? Our guide to mapping pet camera features to your pet helps you decide, and the pet camera setup guide covers the steps from unboxing to the first check-in.
Mount it high enough to see your pet’s whole zone and out of your pet’s reach. A shelf, bookcase or high wall mount works for most rooms. Angle it down slightly, then walk around the room with the live view open to find blind spots.
Put it where your dog rests and where it waits near the door you leave through. If your dog is crated, aim at the front of the crate. Keep the cord well out of chewing range.
Cover the window perch, the food and water station and the sleeping spot, from a high point your cat cannot reach. Keep the sun out of the frame so your cat is not a silhouette.
Any internet-connected camera can be a target if the account or network is weak. The FTC recommends a unique strong password, two-factor authentication, encrypted video and an updated router. Keep the camera out of private rooms as well.
One camera is often enough if your pet stays in one area. If it roams between rooms, or if the walk test shows blind spots you cannot fix by moving the camera, a second camera makes sense.