Cart
0
Complete Your Setup




If your robot vacuum draws phantom walls or keeps losing its way, start simple: delete the corrupted map and remap, clean the LiDAR turret and cliff sensors, confirm the dock hasn’t shifted, and update the firmware. Run one to three uninterrupted mapping passes after that. Most mapping problems clear up with these four moves before you ever touch a setting menu.
TL;DR:
- Most mapping issues result from dirty sensors, reflective surfaces, or a shifted dock, which can often be fixed by cleaning sensors and verifying dock placement.
- Interrupted mapping runs or firmware bugs are common causes; running a dedicated mapping mode without disturbance usually resolves problems quickly.
- For LiDAR and camera sensors, routine cleaning and maintaining proper lighting improve map accuracy and reduce errors.
- Moving the dock or having poor Wi-Fi connection can cause localization failures, so ensure the dock is stable and the robot stays on the 2.4 GHz band.
- If persistent map corruptions occur despite cleaning and remapping, hardware aging may require an upgrade to models with more reliable multi-floor support and advanced sensors.
Most mapping errors trace back to one of five culprits, and matching your symptom to the cause saves you from guessing.
Once you know which one fits your situation, the fix usually takes minutes, not a full afternoon.
Work through these in order. Each step rules out a cause before you move to something more drastic.
Robot vacuum navigation problems rarely need more than this sequence. SLAM-based mapping (the algorithm that fuses sensor data into a floor plan) treats the first map as a rough draft anyway, according to RoboVacGuide’s breakdown of how robot maps work, so don’t panic if pass one looks a little off.
Pro Tip: Run the mapping mode during daylight hours with the blinds open. Extra ambient light helps camera-equipped robots read the room correctly on the first try.
Different sensors fail differently, so the fix depends on which one is misbehaving.
Most apps flag which sensor is struggling through an error code or a blinking LED pattern, so check there before you start disassembling anything.
The dock is not just a charging spot. It is the fixed reference point every map is built around, and moving it even slightly can cause the robot to lose its bearings entirely.
Run through this placement checklist:
You can test the dock’s infrared beacon yourself. Open your smartphone camera (not through a filter app) and point it at the dock in a dim room. Most phone sensors pick up the IR light as a faint glow, confirming the beacon is actually transmitting, a check recommended in Robot Vacuum Hub’s dock troubleshooting guidance.
Wi-Fi matters too. Keep your robot on the 2.4 GHz band, disable band steering if your router forces devices onto 5 GHz, and move mesh nodes closer if the robot loses connection mid-clean. While you’re in the app, double-check floor selection and any virtual boundaries. A robot pulling up the wrong saved map is an app-settings problem, not a sensor one.
Remap when quick fixes fail, or when the map shows rooms that don’t exist. Here’s the cleanest way to do it:
If you’ve permanently rearranged a room, remap after the furniture settles into its new spot rather than trying to patch the old map. Many troubleshooting guides suggest running a couple of full cleaning cycles post-remap just to let the layout refine itself, a detail Household Robot’s navigation fix guide backs up as well. For a deeper look at how the underlying mapping technology actually works, A guide on how robot vacuum mapping works walks through the process in plain terms.
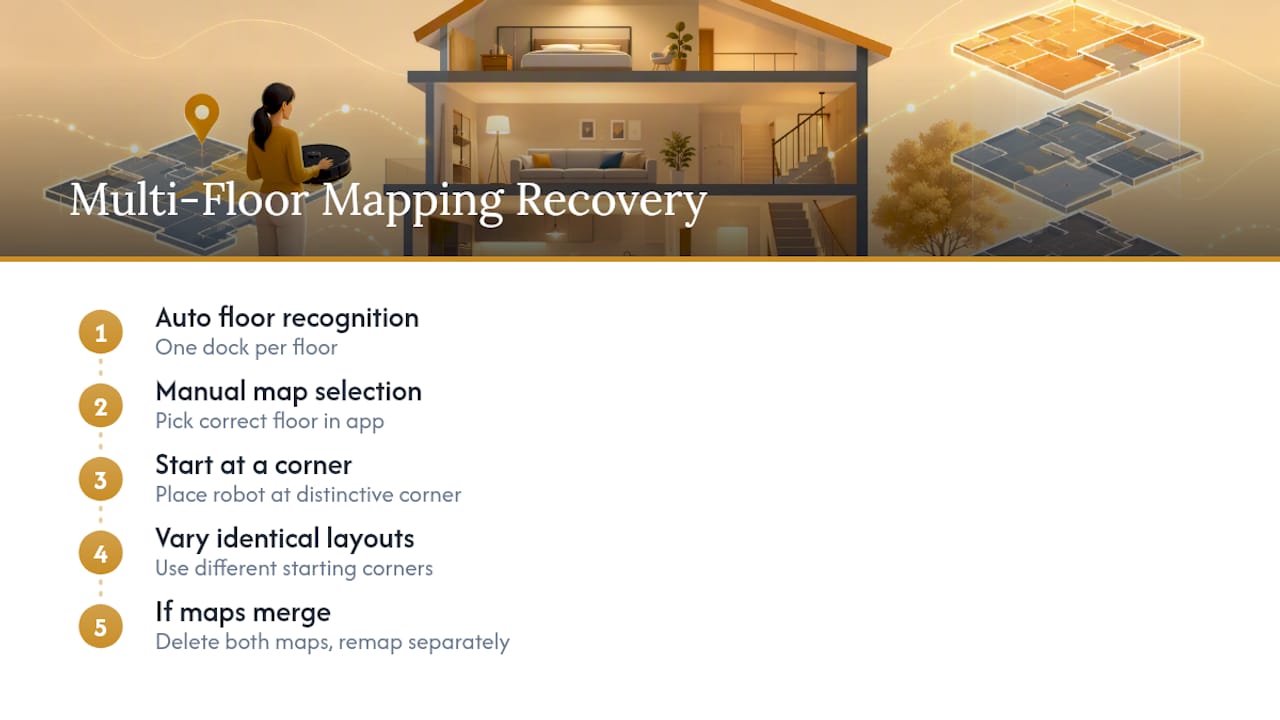
Multi floor mapping robot vacuum setups fail most often when the robot can’t tell which level it’s on. If you want automatic floor recognition, place a dock on each floor. Otherwise, manually select the correct floor in the app before you start cleaning.
When carrying the robot between levels, set it down at a distinctive corner rather than the middle of the room. That landmark helps it match against the correct stored map. Identical layouts across floors (same size bedroom, same furniture placement) confuse the matching process, so vary the starting point if you can. If two floors ever merge into one garbled map, delete both and remap them separately, each from its own unique starting corner.
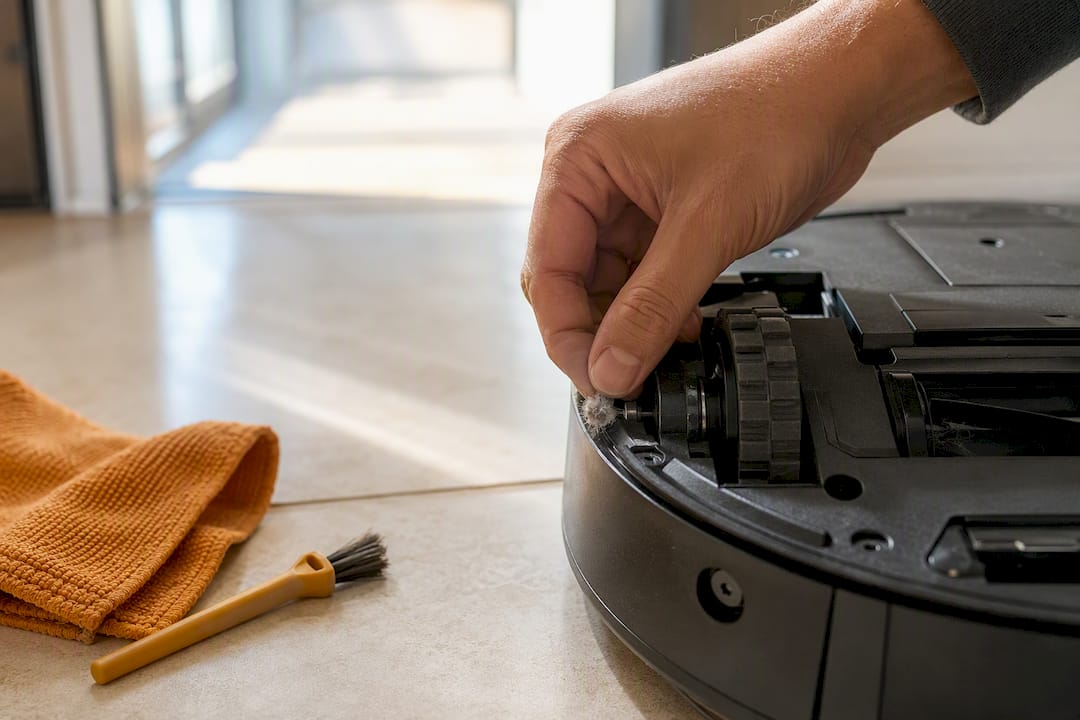
Sensors need routine attention, not just a fix when something breaks. Tony, Sabezon’s product lead on cleaning tech, recommends a five-minute weekly check: wipe the turret or camera lens, clear wheel debris, and confirm the dock hasn’t shifted. If mapping fails repeatedly after cleaning and a full remap, that usually points to a hardware issue worth a warranty claim. Robots built with LiDAR navigation and self-emptying stations, like Sabezon’s FloorPilot™, are designed around these exact failure points. For the full weekly routine, see Sabezon’s robot vacuum maintenance guide.
If a robot keeps corrupting maps right after a clean sensor and a fresh remap, that’s aging hardware talking, not a settings problem. For larger or multi-story homes, LiDAR navigation and reliable multi-floor support are worth paying for outright. Weigh a $150 repair against the price of a new unit before you sink more time into an old motor.
— Tony
A lot of mapping trouble traces back to hardware that’s aging out, not user error, and that’s where Sabezon’s lineup earns its keep. The FloorPilot™ Smart Robot Vacuum pairs LiDAR navigation with a self-emptying station, which cuts down on two of the biggest map-killers: dirty sensors and interrupted runs.
If you’re still cleaning sensors weekly on an older model, browse Sabezon’s full smart cleaning collection for maintenance accessories that make that routine faster. And if repeated remaps have you weighing a replacement, check the FloorPilot™ product page for specs and warranty details before you decide. It takes less time than another failed mapping run.
Beyond mapping errors, the most frequent complaints are getting stuck under furniture, losing Wi-Fi connection, and failing to dock properly. Sabezon’s guide on rescuing a stuck robot vacuum covers the most common physical snags.
Dirty sensors, a moved dock, low light for camera-based models, or an interrupted mapping run are the leading causes. Clean the sensors, confirm the dock hasn’t shifted, and run a fresh mapping pass without lifting the robot mid-cycle.
Delete the current map, clean the LiDAR turret and cliff sensors, verify the dock sits in its original spot, and run a dedicated quick-map mode from start to finish. If the new map still looks wrong, check for a pending firmware update before trying again.
A dedicated quick-mapping mode typically takes about 10 to 15 minutes for an average apartment, according to RoboVacGuide. Larger homes or multi-room layouts take longer, and the map usually needs one or two more cleaning cycles to fully refine.
Remap whenever you make a permanent furniture change, after a major firmware update, or any time simple troubleshooting fails to fix a corrupted map. Outside of those triggers, most homes don’t need a fresh map more than once every few months.